

That first sip of water that tastes a bit "off" is more than just an unpleasant surprise—it's your home's way of telling you that replacing a water filter cartridge is overdue. A calendar reminder is a good start, but the real clues are in the daily performance of your taps, fridge, and even your morning coffee.
Knowing When to Replace Your Water Filter Cartridge
It's easy to forget about that small, cylindrical hero working tirelessly behind the scenes to deliver clean, crisp water. But just like any hard-working component, a water filter cartridge has a finite lifespan.
Ignoring the warning signs doesn't just mean your water quality drops; it means you're no longer getting the protection you paid for. Think of it less as a chore and more as a crucial health check for your household.
Listen to Your Senses
Your senses are often the first and most reliable indicators that it's time for a change. Before you even check the date on your filter, pay attention to these subtle but clear signals.
- Changes in Taste and Odour: This is the most obvious clue. If your water starts to regain that familiar chlorinated or earthy taste, your filter's activated carbon has likely hit its absorption limit. It's just not able to effectively trap the impurities that cause those unpleasant flavours and smells anymore.
- Visible Particles or Cloudiness: Crystal-clear water turning murky is a big red flag. This usually means the filter is so clogged with sediment, rust, and other particles that it can no longer hold them back. Even worse, it might be starting to release them back into your water supply.
Observe Your System's Performance
Beyond taste and appearance, the physical behaviour of your water system gives you critical feedback. A struggling filter will make its presence known through changes in how your appliances operate.
A sudden drop in water pressure from your filtered tap or fridge dispenser is a classic symptom of a clogged cartridge. The filter media is so saturated with contaminants that water has a hard time passing through, slowing the flow to a frustrating trickle. This not only makes filling a glass a painfully slow process but also puts unnecessary strain on your whole system.
Key Takeaway: A significant drop in water flow isn't just an inconvenience; it's a direct sign that your filter is working too hard and is past its prime. Ignoring it can lead to reduced performance and potential stress on your filtration system's components.
Here’s a quick rundown of the signs to watch for.
Signs Your Water Filter Cartridge Needs Replacing
| Symptom | What It Means | Recommended Action |
|---|---|---|
| Bad Taste or Smell | The filter's carbon is exhausted and no longer absorbing chlorine or other contaminants. | Replace the cartridge immediately. |
| Slow Water Flow | The filter is clogged with sediment, rust, or other particulates, restricting water passage. | Time for a new cartridge. |
| Cloudy or Murky Water | The filter is saturated and can no longer trap particles, possibly releasing them back into the water. | Stop using the filter and replace it. |
| Filter Indicator Light | Your system's built-in timer or sensor has detected it's time for a change. | Follow the manufacturer's instructions and replace the cartridge. |
| Past Replacement Date | You've exceeded the recommended lifespan (e.g., 6 months). | Proactively replace the cartridge, even if symptoms aren't obvious. |
These are your best clues for keeping your water fresh and clean.
Understanding the Replacement Timeline
Manufacturers often suggest replacing a filter every six months, but this is really just a guideline, not a strict rule. Your specific needs might be different.
In urban and suburban households across Australia, the average water filter cartridge gets swapped out every 6 to 12 months. However, industry estimates suggest that over 70% of Australian households with water purifiers replace their cartridges at least once a year, with more frequent changes in areas known for harder water.
Several factors can shorten a cartridge's lifespan:
- Local Water Quality: If your municipal water has high levels of sediment or chlorine, your filter has more work to do and will wear out faster.
- Household Size and Usage: A busy family of five will exhaust a filter much quicker than a single person. The more water you filter, the shorter the cartridge's life.
- Age of Plumbing: Older homes with old-school galvanised pipes can shed more rust and particulate matter, placing a much heavier burden on your filter.
Ultimately, knowing how to read these signs is key to maintaining fantastic water quality. If you're wondering what could happen if you wait too long, our guide on the consequences of not changing your water filter has all the details you need to protect your system and your health.
Getting Ready for a Smooth Filter Swap
A little bit of prep work is the secret to a stress-free filter change. It's what makes the difference between a quick, five-minute job and a frustrating hour spent mopping up a surprise puddle from your kitchen floor. Think of this as your pre-game checklist to make sure everything goes off without a hitch.
The single most common mistake people make? Grabbing the wrong replacement cartridge. With so many models and sizes out there, it’s an easy trap to fall into, but it can bring your whole project to a grinding halt.
Get the Right Cartridge, Every Time
Here’s a simple trick I’ve learned that works wonders. Before you even think about heading to the store or browsing online, pull out your phone. Open up the filter housing and snap a clear photo of the old cartridge. Make sure you get a good shot of any labels or model numbers printed on it.
That photo is now your foolproof shopping guide. It completely removes the guesswork and guarantees you’ll come home with the exact match for your system. No more trying to remember a long string of letters and numbers while standing in the aisle.
Pro Tip: I keep a dedicated photo album on my phone just for household maintenance stuff. It has pictures of my filter cartridges, paint colours for touch-ups, and appliance model numbers. It makes reordering parts for any home project an absolute breeze.
Gather Your Tools (It's Not a Long List)
You don't need a professional plumber’s toolkit for this job. In fact, you probably have most of what you need lying around the house already.
Here’s a quick rundown of the essentials:
- The Correct Replacement Cartridge: This one’s non-negotiable. Double-check it against the photo you took.
- A Filter Wrench: This plastic tool usually comes with your filtration system. It's specifically designed to give you the leverage needed to loosen the housing without accidentally cracking the plastic.
- An Old Bucket or Bowl: This is purely to catch the water that will spill out when you unscrew the filter housing. It's a simple step that keeps your cupboards dry.
- A Few Old Towels: Just place these under and around your work area to soak up any drips or small splashes. It’s cheap insurance against a slippery mess.
That’s really it. With these few things ready to go, you’re set up for a clean and efficient replacement. And if you're thinking about upgrading your entire setup, a DIY option like the Awesome Water® Quick Fit Kit can be a great project for transforming a standard tap into a filtered one.
The Most Important Step: Safety First
Before you even think about putting that wrench on the filter housing, you have to deal with the water. This isn't just a suggestion—it's absolutely critical if you want to avoid a high-pressure shower in your kitchen.
First, find and turn off the water supply that feeds the filter. For an under-sink system, this is usually a small valve on the cold water line. For a whole-house system, you'll need to shut off the main water supply to your entire home.
Next, you have to relieve the pressure in the system. After you’ve shut the water off, just open the filtered water tap. You’ll see a short burst of water that quickly slows to a trickle and then stops completely. That’s how you know the pressure is gone, making it safe to open the filter housing.
With the right parts in hand, your tools organised, and the water safely off, you've created a clean, controlled workspace. Now you can move on to the main event: swapping out that old cartridge.
Getting Stuck Into It: Replacing Different Water Filter Cartridges
Alright, you've got your new cartridge and your tools laid out. It's time to get hands-on. The good news is that changing most common household water filter cartridges is a pretty straightforward job. Even if you've never done it before, don't sweat it. While every system has its own little quirks, the basic steps are the same, and I'll walk you through them with practical tips from years of experience.
This simple diagram breaks down the essential prep work before you touch a single filter.
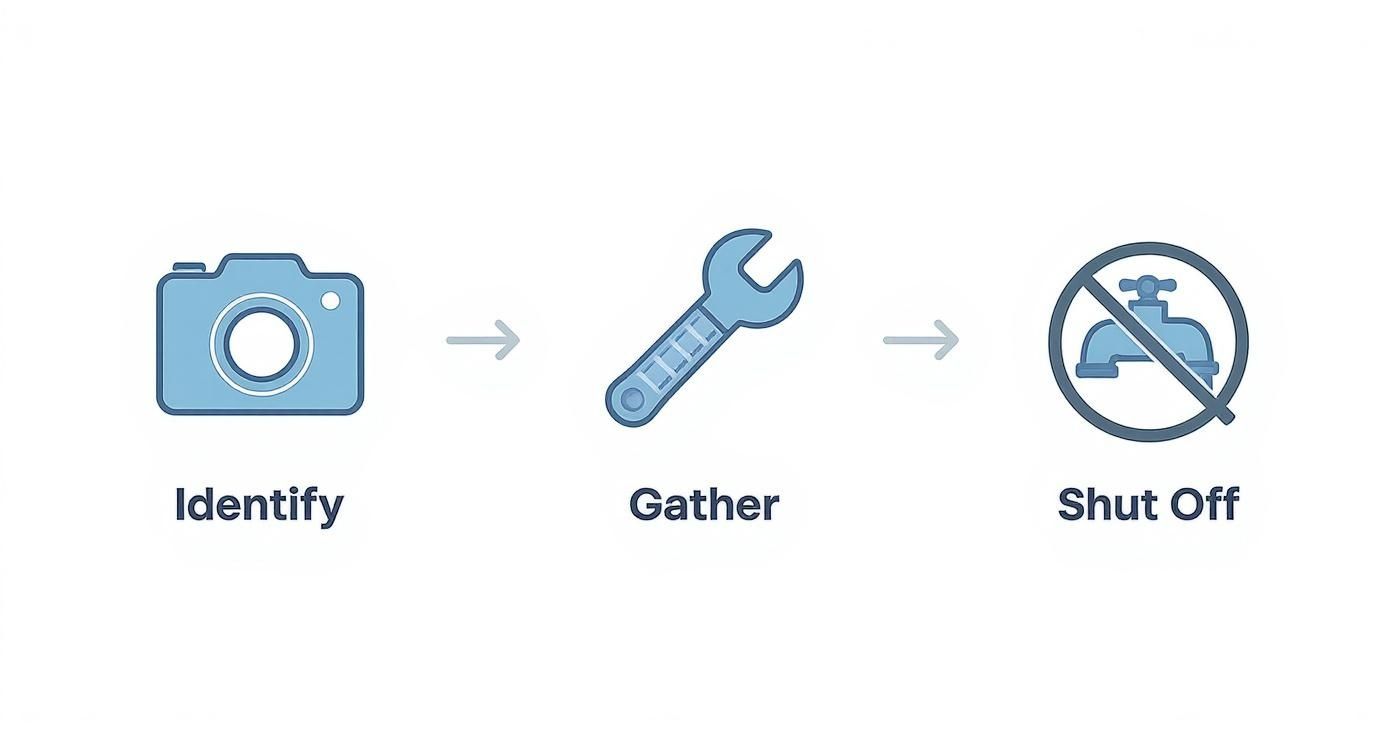
Think of it as your pre-flight check: Identify, Gather, and Shut Off. Get these three right, and you're set up for a smooth, leak-free filter swap.
The Under-Sink System Swap
Under-sink filters are fantastic, but let's be honest, they can be the most intimidating to tackle. You're often crammed in a tight space, and those filter housings can be notoriously stubborn. The secret is to work smarter, not harder.
Once the water is off and you've run the tap to release the pressure, shove your bucket and towels under the filter housing. Slide the plastic filter wrench onto the base of the housing and give it a firm turn anti-clockwise. Just remember the old saying: "righty-tighty, lefty-loosey."
If that housing won't budge, resist the urge to just heave on it with all your might—that’s a good way to crack the plastic. Instead, apply steady, even pressure. A short, sharp push is often far more effective than a long, straining effort. Once you feel it break free, you can unscrew it by hand and gently lower it into your bucket.
A Plumber's Secret Weapon: Before you pop the new cartridge in, take a look at the large black O-ring seated at the top of the housing. Wipe it clean and smear a thin layer of food-grade silicone grease on it. This tiny step is a game-changer. It lubricates the seal, stops it from pinching or binding, and almost guarantees a perfect, leak-free fit when you tighten it all back up.
With the new cartridge in place, screw the housing back on until it's hand-tight. Then, just use the wrench for a final quarter-turn to snug it up. Whatever you do, don't over-tighten it. You can damage the O-ring and make the next filter change a real nightmare.
Mastering the Fridge Filter Change
Thankfully, refrigerator filters are designed with ease-of-use in mind. Most modern fridges use a dead-simple push-and-twist system that makes replacing the cartridge a 60-second job, tops.
You'll usually find the cartridge in one of three spots:
- Inside the fridge itself, tucked behind a small cover.
- Down in the grille at the bottom of the fridge.
- Behind the entire fridge (this is much less common in newer models).
To get the old one out, you might need to push a button to release it, or more commonly, just twist it a quarter-turn anti-clockwise until it unlocks. It should then pop right out. A little water might drip out as you remove it, so keep a cloth handy.
Putting the new one in is just the reverse. Line it up, push it in firmly, and twist it clockwise until it locks into place. You’ll usually hear or feel a definite "click" to let you know it's seated properly. Most fridges will also need you to reset the "change filter" light, which usually just involves holding a specific button down for a few seconds.
Tackling Inline and Whole-House Filters
Inline filters, the kind you often see connected to ice makers or a separate drinking tap, are similarly simple. Many now use quick-connect fittings. To release the old filter, you just press down on the small collar where the water line enters the filter body while pulling the tube out at the same time.
Whole-house systems are just bigger versions of under-sink units, following the same basic principles. The main difference is you’ll need to shut off the main water supply to your entire home. They often have a built-in bypass valve, which is a great feature that lets you route water around the filter during the change, so your home isn't left completely dry.
It's worth noting that water conditions across Australia vary quite a bit, which can affect how often you need to do this. For example, households in Western Australia tend to replace their water filter cartridges an average of 1.5 times per year, which is a bit more than the national average of once annually. This is often down to the region's unique mineral content in the water, demanding more frequent swaps for top performance. As people become more environmentally conscious, about 40% of consumers in WA are now opting for eco-friendly biodegradable or recyclable cartridges.
The Final, Crucial Step: Flushing
So, you've installed the new cartridge, double-checked for leaks, and packed away your tools. You're not quite done yet. The last step is flushing the new filter, and it's one you absolutely cannot skip.
New cartridges, particularly those with activated carbon, are full of tiny, loose particles known as "carbon fines." They're completely harmless, but if you don't flush them out, they can give your water a cloudy, greyish look and a pretty unpleasant taste. For a deeper dive, check out our detailed article on how carbon water filters work and their benefits.
Here's how to flush the system properly:
- Slowly turn the water supply back on. You should hear the sound of the filter housing filling up.
- Open the filtered tap all the way and let it run for at least 5-10 minutes.
- Watch the water. At first, you'll probably see discoloured, cloudy water coming out. This is perfectly normal.
- Keep the tap running until the water is completely clear, with no cloudiness or dark flecks.
This process not only purges any trapped air from the lines but also washes away all those loose carbon fines. It effectively "activates" the filter media, getting it ready to deliver pure, great-tasting water. Once it runs clear, your job is officially done. Now you can relax and enjoy the peace of mind that comes with knowing your water is freshly filtered and safe.
Troubleshooting Common Issues After a Cartridge Change
You’ve done everything by the book—you picked the right cartridge, shut off the water, and gave the new filter a solid flush. But something’s still not quite right. Don't worry, post-replacement hiccups are surprisingly common, and most are quick fixes you can handle yourself without calling a plumber.
Even with a perfect installation, you might spot a slow drip, a sputtering tap, or find the water doesn't taste as crisp as you expected. Think of this section as your first-aid kit for those minor but annoying issues. We'll help you diagnose the problem and get your system running flawlessly.
Dealing with Leaks and Drips
The most common—and nerve-wracking—issue after a filter change is the dreaded slow drip from the filter housing. Seeing a puddle where there shouldn't be one is alarming, but the cause is almost always simple.
Before you panic, check the most likely culprit: the O-ring. This big rubber gasket is what creates the watertight seal. If it wasn't seated perfectly in its groove when you tightened everything up, it can get pinched or twisted, creating a tiny gap for water to escape.
Another common mistake is actually over-tightening. It sounds backward, I know, but cranking down on the housing with all your strength can warp the O-ring or even crack the plastic housing, which leads to a much bigger problem.
- The Fix: Turn the water off again and release the pressure. Unscrew the housing and take a close look at the O-ring. Make sure it's clean, sitting snugly in its groove, and lightly lubricated with a bit of food-grade silicone grease. Screw the housing back on until it's hand-tight, then use the wrench for just a final quarter-turn to snug it up. That's usually all it needs.
Restoring Low Water Pressure
You’ve just put in a brand-new, clean filter, so you're expecting amazing water flow. Instead, you get a weak, sputtering trickle. This is almost always caused by air trapped in the system.
When you open the filter housing, water drains out and air rushes in to take its place. After you turn the water back on, this air gets trapped in the lines and inside the new filter cartridge. These little airlocks are what restrict the water flow.
Purging the air is a simple but vital step. A new filter needs to be fully saturated with water to work correctly, and trapped air prevents this from happening efficiently, leading to poor pressure and sputtering at the tap.
Fixing this is easy—you just need to purge the system. Open the filtered water tap all the way and just let it run. It's going to sputter and spit for a minute or two as all that trapped air works its way out. Let it run continuously for at least five minutes to ensure every last bubble has been pushed through. You'll notice the flow gradually strengthen until it becomes the steady, consistent stream you were expecting.
Addressing Strange Tastes or Cloudy Water
You’ve flushed the new cartridge, but the water still tastes a little... off. Or maybe it looks cloudy. While it might seem worrying, this is usually temporary. That greyish, cloudy look is often just harmless carbon fines—tiny particles of activated carbon that are still washing out of the brand-new filter.
Sometimes, a longer flush is all it takes. Let the tap run for a full 10-15 minutes to thoroughly clear out any leftover fines and properly activate the new carbon media.
If the water is cloudy but not grey, it’s probably just aerated water. These are just tiny air bubbles that make the water look milky, which is common after a filter change. To be sure, fill a clear glass and let it sit on the counter. If it clears from the bottom up within a minute or two, it’s just air bubbles and is perfectly safe. If you're curious, our guide explains everything you need to know about whether it's okay to drink cloudy tap water.
Still getting a strange taste after a long flush? Just double-check that you removed all the plastic wrapping from the new cartridge before you installed it. It’s a simple mistake, and it’s surprisingly easy to make when you’re in a hurry
Simplifying Your Filter Maintenance Routine
You’ve successfully swapped out your water filter cartridge—great job! But the real win isn't just doing it once; it's turning that task into a simple, sustainable habit. Good maintenance isn't about adding another chore to your list. It’s about creating a straightforward system that makes every future replacement easier than the last.
Let's build a set-and-forget strategy that keeps your home's water quality consistently high without the hassle.
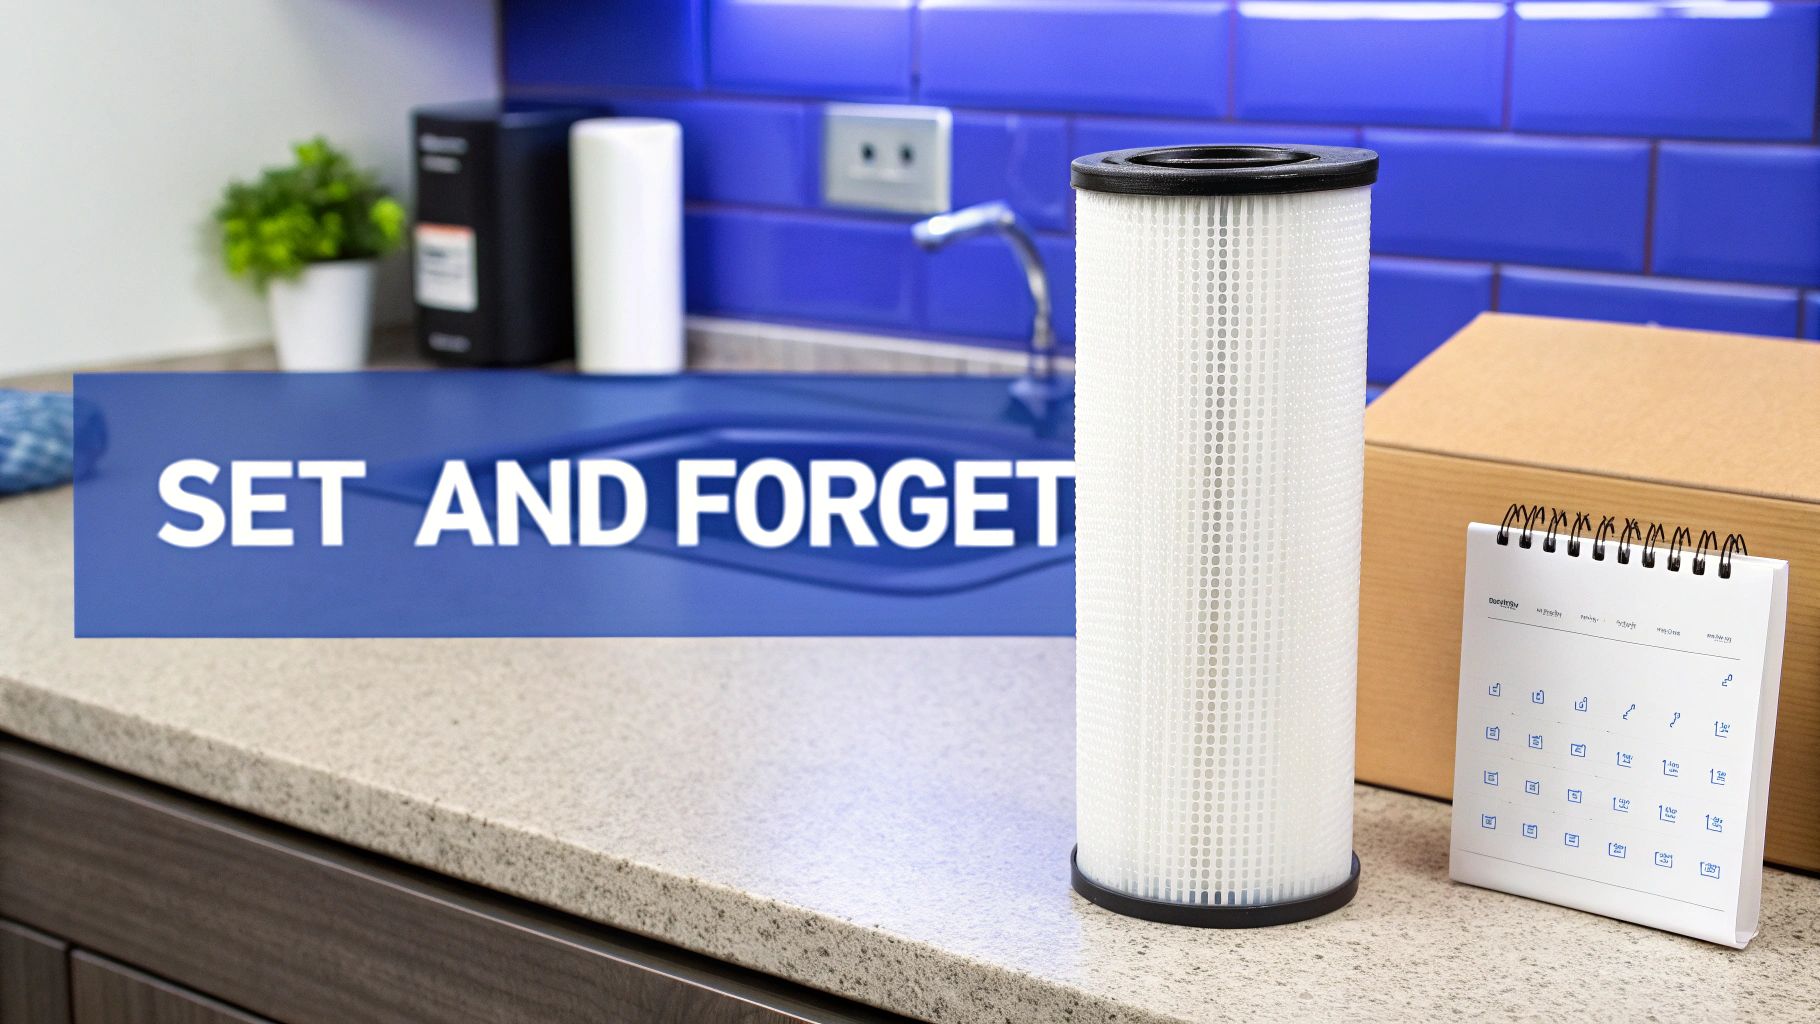
A few small habits can completely eliminate the guesswork. One of the simplest yet most effective tricks I’ve seen is to grab a permanent marker and write the installation date directly on the new cartridge. Six months from now, when you're wondering if it's time for a change, the answer will be staring right back at you.
Make Each Change a Health Check
Every time you open up the filter housing, you’ve got the perfect opportunity for a quick system health check. Over time, biofilm and bacteria can start to build up on the inside surfaces. If you ignore this, you could be compromising the quality of your freshly filtered water from day one.
While the housing is empty, give it a quick scrub with warm, soapy water and a soft brush. For an even deeper clean, you can use a diluted sanitising solution. This simple step ensures your fresh cartridge goes into a pristine environment, preventing any sneaky contaminants from building up.
For more in-depth advice, check out our guide on how to maintain a water filter to prolong its life.
Important Takeaway: Sanitising the filter housing during a cartridge change is a crucial step for preventing bacterial growth. A clean housing ensures your new filter can do its job effectively, providing the safest and purest water possible.
Streamline Your Reordering Process
Life gets busy. Remembering to order a new filter cartridge often slips down the to-do list until your water starts tasting a bit off. This is where a little automation can make sure you always have a replacement on hand right when you need it.
Many suppliers, including Awesome Water®, offer subscription services or bulk filter packs. A subscription automatically delivers the correct cartridge to your door, right on schedule.
- Set and Forget: Automatic deliveries mean you never have to think about reordering again.
- Cost Savings: Buying in bulk or subscribing often comes with a significant discount per filter.
- Guaranteed Stock: You'll never be caught out when that filter light flicks on or the calendar reminder pops up.
This approach transforms filter maintenance from a reactive chore into a proactive, seamless part of your home routine.
Responsible Cartridge Disposal
Once the new cartridge is in, what do you do with the old one? Tossing it in the general waste bin is the easiest option, but it's not the most environmentally friendly. These cartridges are filled with plastic and used filter media that just add to landfill.
Before you throw it away, take a moment to explore your local recycling options. Some councils and specialised recycling programs accept water filter cartridges. A quick search for "water filter recycling near me" can point you in the right direction. Taking this extra step helps reduce plastic waste and supports a more sustainable approach to clean water.
Got Questions About Your Filter Change? We’ve Got Answers.
Even after you’ve successfully swapped out a filter, a few questions can bubble up. That's completely normal, especially when you're focused on getting the best quality water for your family. We get these questions all the time, so we’ve put together some straightforward answers to help you handle any situation with confidence.
Think of this as your go-to guide for those final "what if" scenarios. Getting these details right is the key to making sure your system runs perfectly for years.
Can I Just Use a Generic Brand Cartridge?
This one comes up a lot, and it's easy to see why a cheaper, generic filter might seem tempting. While some third-party cartridges might look like they fit your system, we always, always recommend using the manufacturer-specified replacement. These are often called OEM (Original Equipment Manufacturer) parts.
There’s a good reason for this. OEM cartridges are engineered to meet your system's exact standards for filtration, fit, and flow rate. Popping in an incompatible filter can cause a few headaches:
- It Might Not Do Its Job: The filter might not catch contaminants as effectively, which kind of defeats the whole purpose of having a filter in the first place.
- You Could Spring a Leak: Even a slightly different size or gasket design can prevent a proper seal. The last thing you want is a slow drip damaging your cupboards.
- It Could Damage Your System: An incorrect fit can put stress on the filter housing, potentially causing damage over time.
If you’re set on trying a generic brand, at the very least, triple-check that it explicitly lists compatibility with your specific model number and meets Australian water filtration standards.
What Really Happens If I Don't Replace My Filter on Time?
It’s easy to let a filter change slide, but putting it off can cause a cascade of problems. At first, the filter just stops working as well as it should. The activated carbon inside gets saturated and can no longer trap nasties like chlorine, sediment, and heavy metals, meaning the quality of your water will start to decline.
Soon after, you’ll notice your water flow slowing to a crawl. A clogged filter can turn filling a glass of water into a frustratingly slow trickle.
But here’s the biggest concern: over time, all those trapped contaminants can become a breeding ground for bacteria. This buildup, or biofilm, can then leach back into your "filtered" water, creating a serious health risk. Sticking to the recommended schedule is the best way to protect both your family and your filtration system.
Why Is My Filter Housing Completely Stuck?
A stuck filter housing is one of the most common frustrations we hear about, but it usually has a simple cause. Nine times out of ten, it’s either been over-tightened during the last installation, or a build-up of water pressure has created a stubborn vacuum seal.
First, make absolutely sure you’ve turned off the water supply and have relieved all the pressure in the system. You do this by opening the filtered tap and letting it run until it stops completely. Now, grab the plastic filter wrench that came with your system—it’s specifically designed to give you the right leverage without cracking the housing.
Apply steady, even pressure when you turn it. Don't jerk the wrench, as this can cause the plastic to crack. If it still won’t budge, a gentle tap on the end of the wrench with a rubber mallet can sometimes be enough to break the seal. Whatever you do, avoid using metal tools! They can easily damage or crack the plastic housing, turning a small job into a much bigger problem.
At Awesome Water®, our goal is to make keeping your water pure and great-tasting as simple as possible. If you're ever unsure about a replacement or just need some expert advice, our team is always here to help. Explore our range of easy-to-install replacement filter packs and subscription options to make sure you never miss a change again.